
Are you ready to take a hilarious plunge into the mesmerizing realm of audio recording on your trusty Mac? Whether you fancy yourself the next musical sensation, a podcasting prodigy, a content creator extraordinaire, or simply a sound enthusiast yearning to capture life’s quirkiest moments in eargasmic quality, hold onto your seats! This guide is your golden ticket to unleashing the full, wild potential of your Mac’s audio-recording superpowers.
In this uproarious guide, we’ll merrily escort you through the audio adventure of a lifetime. Picture it: from the innocent basics of setting up your gear to the high-octane thrill of mastering the most extravagant recording tricks, we’ve got your back. So, don your headphones, fill that cup with your favorite caffeinated rocket fuel, and brace yourself for this whimsical sonic odyssey we’re about to embark upon together!
Why Record Audio on a Mac?
Before we plunge headfirst into the enchanting world of Mac audio recording, let’s pause for a moment and ponder why on Earth you’d want to embark on this sonic adventure.
So, let’s talk Mac’s Audio Mojo: Macs have a reputation for being the rock stars of the audio world. Think of them as the Mick Jaggers of the computer realm. Their built-in audio hardware and software aren’t just top-notch; they’re the equivalent of having a symphony orchestra in your backpack. We’re talking sound quality that can make your ears dance and flexibility that would make a yoga master jealous. Macs are like the James Bond of the audio recording universe – smooth, reliable, and always ready for action.
Creativity Unleashed: Recording audio on your Mac opens up a world of creative possibilities. Whether you’re a musician, a voice actor, or a filmmaker, you can use your Mac to bring your ideas to life with pristine audio recordings.
Versatility: Macs can handle a wide range of audio recording tasks. From recording music and podcasts to capturing voiceovers and field recordings, your Mac can be your trusty companion.
Convenience: With the right setup, recording audio on a Mac is incredibly convenient. You can do it from the comfort of your home or take your Mac on the go for mobile recording sessions.
Getting Started: Essential Equipment
Now that you’re eager to get started, let’s talk about the essential equipment you’ll need for your audio recording journey.
Microphone Selection
The heart of your recording setup is the microphone. The type of microphone you choose will significantly impact the quality of your recordings. Here are a few options.
USB Microphones
Pros:
- User-Friendly Convenience: USB microphones shine with their ease of use. Just plug one into an open USB port on your Mac, and voilà, you’re good to go—no fussing about with extra gear or hunting down drivers.
- Budget-Friendly Options: USB microphones come in a diverse price spectrum, making them a wallet-friendly pick for newcomers or anyone watching their pennies.
- On-the-Go Recording: Thanks to their plug-and-play simplicity, USB microphones are the champions of portability. Take them along for spontaneous recording sessions wherever your creativity leads you.
Cons:
- Sound Quality: While USB microphones can deliver decent sound quality, they may not match the audio fidelity of higher-end microphones, such as condenser or dynamic mics.
- Limited Options: The variety of USB microphones available in the market may not offer the same diversity of sound capture as other types of microphones.
Ideal for: Podcasters, YouTubers, voiceover artists, and beginners looking for a straightforward recording solution.
Condenser Microphones
Pros:
- Studio-Quality Sound: Condenser microphones are known for their ability to capture rich, detailed, and clear audio. They excel at reproducing the nuances of vocals and musical instruments.
- Versatility: These microphones are versatile and can handle a wide range of recording tasks, from vocals to acoustic instruments.
- Professional Grade: Condenser microphones are commonly used in professional studios for their exceptional sound quality.
Cons:
- Price: Quality condenser microphones can be relatively expensive. Additionally, you’ll need an audio interface to connect them to your Mac, adding to the cost.
- Sensitivity: Condenser mics are sensitive to sound, which can be both an advantage and a disadvantage. They pick up even subtle noises, so you’ll need a quiet recording environment.
Ideal for: Musicians, singers, studio recording, voice actors, and anyone seeking top-notch audio quality.
Dynamic Microphones
Pros:
- Durability: Dynamic microphones are known for their ruggedness and ability to withstand high sound pressure levels. They are great for live performances and recording loud sources.
- Background Noise Rejection: These mics excel at rejecting background noise, making them ideal for recording in less-than-ideal acoustic environments.
- Affordability: Dynamic microphones are often more budget-friendly compared to condenser microphones.
Cons:
- Sensitivity: They are less sensitive than condenser microphones, which means they might not capture as much detail in quieter sources.
- Tonal Range: Dynamic mics may not offer the same tonal range and sonic character as condenser mics.
Ideal for: Live performances, podcasting in noisy environments, recording amplifiers and drums, and situations where durability is crucial.
When selecting a microphone, consider your specific needs, budget, and the type of audio you’ll be recording. It’s also a good idea to read reviews and, if possible, test microphones to find the one that best suits your preferences and requirements. Remember that while the microphone is a critical component, the overall quality of your recordings will also depend on factors like acoustics, mic placement, and post-production techniques. So, choose wisely and start creating your sonic masterpiece!
Audio Interface
An audio interface is like the unsung hero of your recording setup. It serves as the crucial link between your microphone and your Mac, translating analog audio signals into digital data that your computer can understand and manipulate. Here’s a closer look at what audio interfaces do and why they are essential:
- Analog-to-Digital Conversion: When you speak into a microphone or play an instrument, you’re generating analog audio signals. These signals are continuous waveforms representing the sound you’re producing. However, your Mac’s recording and editing software operates in the digital domain, which relies on discrete values. An audio interface takes those analog signals and converts them into digital data by “sampling” the audio at a high frequency. This process involves measuring the amplitude of the audio signal thousands of times per second, resulting in a stream of digital data that can be processed by your Mac.
- Improved Sound Quality: The quality of your audio interface plays a significant role in the overall sound quality of your recordings. Higher-end interfaces offer better analog-to-digital converters (ADCs) and preamps, resulting in cleaner, more detailed recordings. Musicians, in particular, often opt for high-quality interfaces to capture the nuances of their performances accurately.
- Connection Options: Audio interfaces come with various input and output options. Common types of inputs include XLR, 1/4-inch, and RCA connectors. Depending on your needs, you can choose an interface with the right combination of inputs for microphones, instruments, or other audio sources. Additionally, they offer outputs for connecting to studio monitors or headphones, allowing you to monitor your recordings in real-time.
- Low Latency Monitoring: Audio interfaces often feature “direct monitoring” capabilities, which allow you to hear the incoming audio signal in real-time without any noticeable delay (latency). This feature is crucial for performers who need to hear themselves while recording without the distracting delay that can occur if you rely solely on your Mac’s processing.
Headphones
A good pair of headphones is essential for monitoring your recordings and ensuring you capture the best possible sound. Look for headphones designed for audio production with accurate sound reproduction.
Mic Stand and Pop Filter
Invest in a sturdy microphone stand to keep your mic in place and a pop filter to reduce plosive sounds (those pesky “p” and “b” sounds) in your recordings.
Acoustic Treatment
Consider treating your recording space with sound-absorbing materials to minimize reflections and unwanted background noise.
Choosing the Right Software
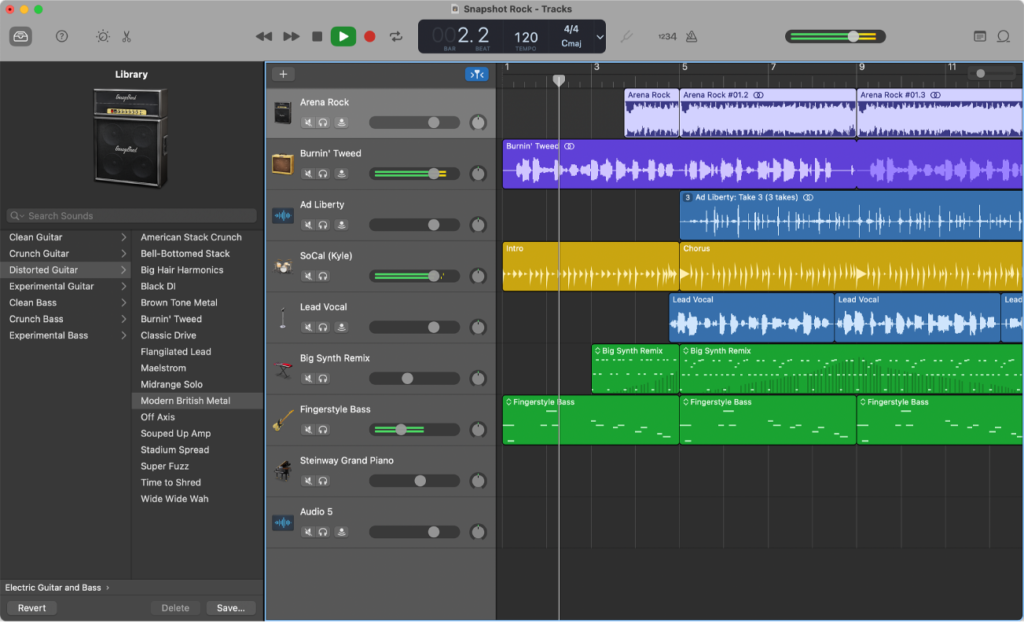
Now that you have your hardware sorted, it’s time to choose the right software for your audio recording needs. Your Mac comes with GarageBand, a powerful and user-friendly option for beginners.
If you’re looking for more advanced features, consider investing in professional software like Logic Pro X or Pro Tools. These programs offer a wide range of audio editing and processing tools, perfect for musicians and audio engineers.
Setting Up Your Microphone
You’ve got your microphone, and you’re ready to record, but how do you set it up properly?
- Connect Your Microphone: If you’re using a USB microphone, simply plug it into an available USB port on your Mac. For condenser microphones, connect them to your audio interface using an XLR cable.
- Positioning: Experiment with microphone placement to find the sweet spot for your recordings. Keep the microphone at a consistent distance from your sound source for uniform sound capture.
- Pop Filter: Attach a pop filter to your microphone to reduce unwanted plosives and sibilance.
- Headphones: Plug your headphones into your Mac or audio interface for real-time monitoring.
Optimizing Audio Settings on Your Mac
Your Mac has various audio settings that can affect your recording quality. Let’s optimize them:
- Sample Rate and Bit Depth: Higher sample rates (e.g., 96kHz) and bit depths (e.g., 24-bit) offer better audio quality but also result in larger file sizes.
- Input and Output Settings: Ensure your Mac is set to recognize your microphone and headphones as input and output devices.
- Buffer Size: Adjust the buffer size in your audio software to minimize latency while recording.
Recording Techniques and Tips
Now, it’s time to hit that record button and start creating your audio masterpieces. Here are some recording tips:
- Levels: Keep an eye on your input levels to prevent clipping (distortion) and maintain a healthy signal-to-noise ratio.
- Room Acoustics: If you’re in a less-than-ideal acoustic environment, use acoustic treatment or record in a quieter space.
- Multiple Takes: Don’t be afraid to record multiple takes to ensure you capture the best performance.
Editing and Enhancing Your Audio
Recording is just the beginning; the real magic often happens during the editing process. Most audio software provides tools for:
- Cutting and Trimming: Remove unwanted sections and clean up your recordings.
- Equalization (EQ): Adjust the frequency balance for clarity and tone.
- Compression: Control dynamic range for a more polished sound.
- Effects: Add reverb, delay, or other effects to enhance your recordings.
Backing Up and Storing Your Recordings
Your audio recordings are precious, so make sure to back them up regularly. Consider using cloud storage or external hard drives to keep your files safe.
Sharing Your Audio Creations
Once you’ve perfected your audio, it’s time to share your creations with the world. You can distribute your music on streaming platforms like Spotify, share podcasts on platforms like Apple Podcasts, or even create soundtracks for your videos.
Troubleshooting Common Issues
Encountering problems along the way is normal, but don’t worry, we’ve got you covered with some common troubleshooting tips:
- Audio Latency: If you experience delay when monitoring, adjust your buffer size.
- Background Noise: Investigate the source of noise and use noise reduction tools during editing.
- Clipping: Lower your input gain to avoid distortion.
Future-Proofing Your Recording Setup
As technology evolves, it’s essential to keep your recording setup up-to-date. Consider upgrading your microphone, software, or audio interface as your skills and needs grow.
Conclusion: Your Sonic Adventure Awaits!
Recording audio on a Mac is not just a technical process; it’s a journey of self-expression and creativity. Armed with the right equipment, software, and techniques, you can unleash your inner artist and capture the sounds that matter most to you.
So, whether you’re a musician crafting your next hit song or a podcaster sharing your thoughts with the world, your Mac is your trusty sidekick in this sonic adventure. Record, edit, and share your audio creations with confidence, and let your creativity flow freely. Your sound, your story, your Mac – the perfect harmony. Happy recording!
Now, go ahead and let the world hear your voice, one audio recording at a time. Your journey starts here, with your Mac as your faithful companion in the world of audio recording.

Marcus Levingston is a Senior Editor and Reviewer for Blubbedev.net, with a deep passion for technology. With a background in Electrical Engineering, Marcus has been reviewing tech products for nearly a decade, offering valuable insights and analysis. Currently, Marcus specializes in testing computer displays and other related technologies, keeping readers informed about the latest advancements.